
Much of full-stack web development has evolved from traditional HTML/CSS/JS architecture to the use of full-scale JavaScript-themed libraries and frameworks. One of these is Svelte which alongside Angular, React and Vue – is largely being adopted as a rapidly scalable web framework. In this article, we’ll explore building a full-stack web app with Node JS for our server.
Our app will be a CALL OF DUTY gift card store that uses Reloadly’s GiftCard API to make the gift card available and Stripe’s Session API to create a checkout session where we can purchase the gift card. As a reader, the concepts in this article will be easier to grasp if you have an intermediate understanding of JavaScript, NodeJS, and Svelte. You may want to refer to these resources while reading as well:
TL:DR: Code sample on GitHub
Creating a Svelte App and installing dependencies
The first step to creating our gift card store is to scaffold a Svelte app from scratch and install a number of dependencies (also called packages). Here’s a list of dependencies we’ll need for our app:
- axios: A promise-based HTTP client for making API requests.
- dotenv: A module for loading separately stored environmental variables.
- express: A Node JS application framework – this will be used extensively in our server.
- sirv-cli: A lightweight CLI program used to server static sites. This gets auto-installed when you create a new Svelte app.
- stripe: A wrapper for Stripe’s API.
Note: A basic prerequisite for this tutorial is to have Node installed in your machine. If you haven’t done that, you can do so here
Before installing dependencies, create your app by kickstarting the Svelte create-app command in your terminal:
# create a new Svelte project named "svelte-store"
npx degit sveltejs/template svelte-store
# navigate into the folder of the newly created project
cd svelte-store
# install all dependencies in your local "node_modules" folder
npm install
# deploy your application on a localhost server
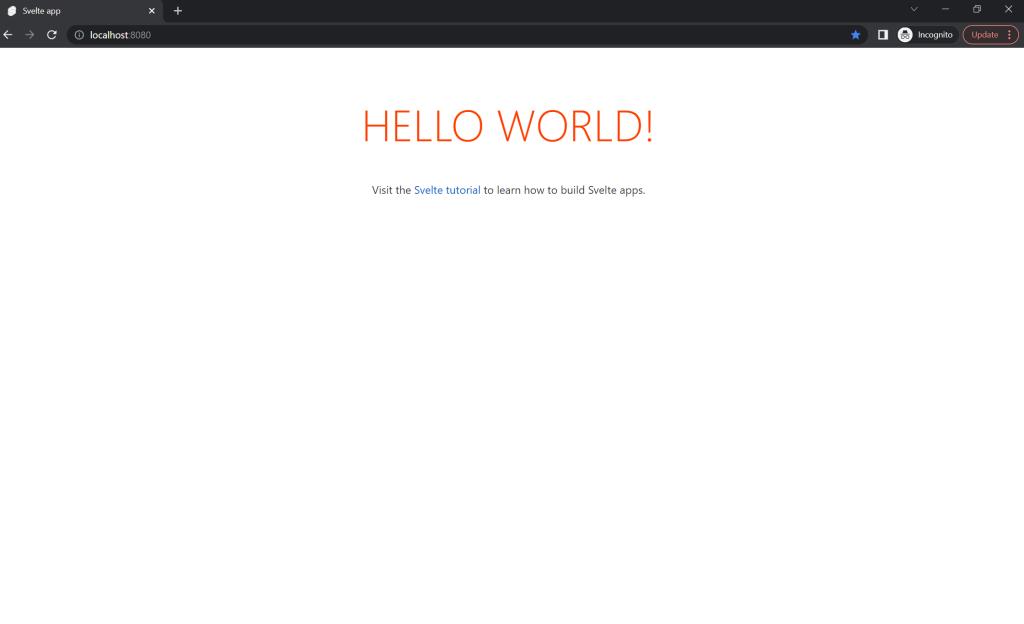
npm run devAt this point, you should see a starter web page in your browser when you navigate to localhost:8080
Building a Node server
The next step is to create a server that handles the requests we’ll make to Reloadly’s and Stripe’s APIs for gift card data fetching and purchases respectively.
Before we go further, take a few moments to sign up for a Reloadly and Stripe account so you can get an access token and secret key respectively. Below are links to short, straightforward guides that show you how to do this:
Once you’re done getting the access token and secret key, navigate to your project’s folder in your terminal and install the list of dependencies mentioned earlier:
npm install axios dotenv express stripeNext, in the root folder of your project create an .env file to protect your sensitive credentials ( access token and secret key ) from being visible alongside your code. In this file, add your access token and secret key and assign them to variables.
.env

STRIPE_KEY='YOUR_SECRET_KEY_HERE'
RELOADLY_TOKEN='Bearer YOUR_ACCESS_TOKEN_HERE'
Next, create a server.js file at the root folder of your project. Begin your server with importing (requiring) all the dependencies you have installed:
// ./server.js

require('dotenv').config();
const express = require("express");
const app = express();
const axios = require("axios");
const stripe = require("stripe")(process.env.STRIPE_KEY);
const accessToken = process.env.RELOADLY_TOKEN
Let’s start with fetching data from Reloadly’s gift card API – create a bunch of variables to handle the request and response data:
// ./server.js

...

const url = "https://giftcards.reloadly.com/products/120";
const headers = {
  Accept: "application/com.reloadly.giftcards-v1+json",
  Authorization: accessToken,
};
let giftCardsData;
let giftCardsAmount;

...
Next, define a route handler that will enable users of our app to make a GET request to Reloadly’s API
// ./server.js

...

app.get("/giftcards", (req, res) => {
  axios
    .get(url, { headers: headers })
    .then((response) => {
      giftCardsData = response.data;
      giftCardsAmount = giftCardsData.fixedRecipientDenominations[0] * 100
      res.send({
        success: true,
        data: giftCardsData,
      });
    })
    .catch((error) => {
      res.send({
        success: false,
        data: error,
      });
    });
});

...
In the code snippet above, a request is made via Axios to Reloadly’s API and the API’s response is assigned to an existing variable. Pay attention to the response parameter fixedRecipientDenominations – this is the price of each gift card and it is iterated through and multiplied by 100 to prevent Stripe’s API from displaying it in cents.
After this, create a second route handler that will enable our users to make a POST request to Stripe’s API when purchasing a gift card.
// ./server.js

...

app.post("/create-checkout-session", async (req, res) => {
  const session = await stripe.checkout.sessions.create({
    line_items: [
      {
        price_data: {
          currency: giftCardsData.recipientCurrencyCode,
          product_data: {
            name: giftCardsData.productName,
          },
          unit_amount: giftCardsAmount,
        },
        quantity: 1,
      },
    ],
    mode: "payment",
    success_url: "https://www.reloadly.com/",
    cancel_url: "https://twitter.com/fullstackmafia",
  });
  res.redirect(303, session.url);
});

...
In the above code snippet, a request is made to Stripe’s API to create a checkout session with details of the gift card’s product. After each payment session is made, we can either redirect the user to a page with a successful message (success_url) or a failed one (cancel_url). Since this is a demo, I used Reloadly’s home page as the successful message and my Twitter account the failed message 
Lastly, configure your server to make files from the public folder in your project accessible via HTTP requests. Also, set a GET route handler to the root of your app and connect your app to your localhost server via Express’ app.listen() function. These are detailed in the code snippet below:
// ./server.js

...

app.use(express.static("public"));
app.get("*", (req, res) => {
  res.sendFile(path.resolve(__dirname, "public", "index.html"));
});
app.listen(5000, () => {
  console.log("Server is up at port 5000");
});
There! You’ve got your server all up and set. You can confirm your server works by kickstarting it in your terminal with the command below:
node server.jsThis should start your server and you should see the confirmatory message you specified in the app.listen() function:
# Server is up at port 5000Building a Svelte component
Once the server is up and running, our next step is to work on creating a Svelte component that displays the gift card as well as the checkout page to our users. In the /src folder of your app, open the App.svelte file and delete the existing template.
For starters, we’ll define an object that handles the state of our app during the duration of an API request – from the point a request is made to fetch gift cards till a response is gotten from Reloadly’s API. Let’s start this by creating an object in our component:
// ./src/App.svelte

<script>
  let buju = {
    productName: undefined,
    loading: false,
  };

  ...
</script>
Next, we’ll specify a variable to handle the gift card data we’ll be getting from our server. We’ll also create an async function to handle our loading state and fetch the gift card data from our server:
// ./src/App.svelte

<script>
 ...

  let results;
  async function getGiftCards() {
    buju.loading = true;
    try {
      const returnValue = await fetch("/giftcards");
      const response = await returnValue.json();
      results = response.data;
      buju = {
        productName: results.productName,
        loading: false,
      };
    } catch (error) {
      console.error(error);
    }
  }
</script>
Now we’ve defined the logic for our Svelte component, let’s complete the display by rendering our welcome message using HTML wrapped with Svelte’s main tag:
// ./src/App.svelte

...
<main>
  <div>
    <p>GET ALL THE CALL OF DUTY GIFT CARDS <br> YOU WANT HERE!</p>
    <button class="search_button" on:click=    {getGiftCards}>SEARCH</button>
  </div>
</main>
Next, we’ll use Svelte’s if/else block to display the response we’ll get from our server. Here, we’ll create ample scenarios for when the gift card data is being fetched:
// ./src/App.svelte

...
<main>
  <div>
    <p>GET ALL THE CALL OF DUTY GIFT CARDS <br> YOU WANT HERE!</p>
    <button class="search_button" on:click={getGiftCards}>SEARCH</button>
  </div>
  <div>
     {#if buju.loading === true}
        <p>Loading giftcards...</p>
     {:else if buju.productName !== undefined }
        <div class="results">
          <img class="product_image" src="{results.logoUrls[0]}" alt="gift card images" width="200px"/>
          <p class="redeem_instructions">Redeem Instructions: {results.redeemInstruction.verbose}</p>
          <p class="price">Price: {results.fixedRecipientDenominations[0]} USD</p>
          <form action="/create-checkout-session" method="POST">
              <button class="search_button" type="submit">BUY NOW</button>
          </form>
        </div>
    {/if}
  </div>
</main>
Now we’re done, one last thing – we need to change how we compile and load our Svelte app by loading it from the server. In the package.json file of your app, change the start property in the scripts object from sirv public --no-clear to node server.js:
// ./ package.json

...

  "scripts": {
    "build": "rollup -c",
    "dev": "rollup -c -w",
    "start": "node server.js"
  }

...
Purchasing a Gift Card
Looks like we’re good to go! Let’s save all our files and in our terminal, navigate to our app’s folder and run the npm run dev command.
As specified in the server, our app’s development environment should be live on port 5000. Let’s launch the app and attempt to make a gift card purchase:
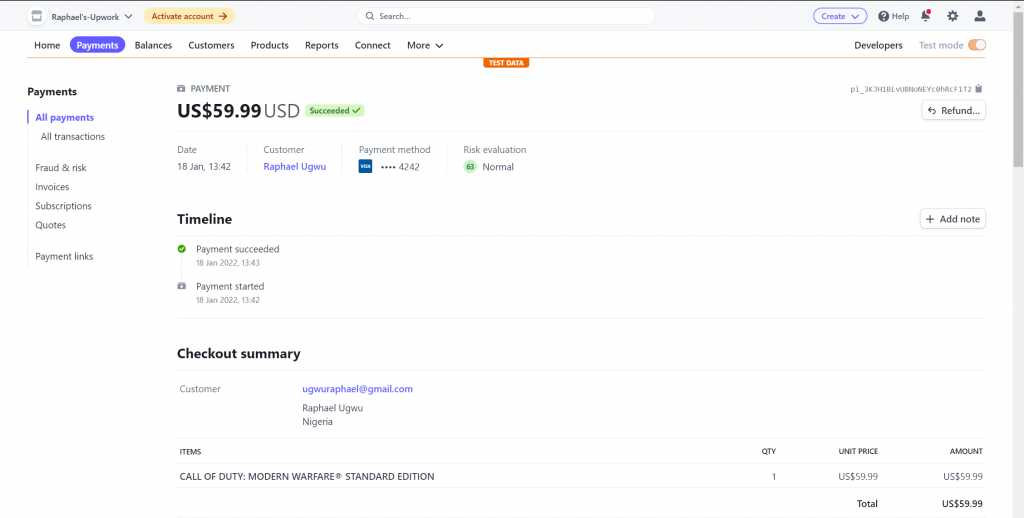
In the above video, we can see how our app works when I purchased a CALL OF DUTY gift card from the data rendered from Reloadly’s gift card API, completed the order via Stripe’s checkout session, and was redirected to Reloadly’s homepage as proof that my order was successfully completed. To confirm this, below is a screenshot from my Stripe account showing the purchase:
Additional Challenges
Building on our current app, we can explore the possibility of returning data on multiple gift cards via Reloadly’s Get all products gift card endpoint and paying for them via different checkout sessions for each respective product.
Summary
Working with Stripe and Node JS to build full-stack applications is awesome as it enables you to expand your learning curve and explore JavaScript using a different approach. Like to take a look at the code? you can find it here on GitHub. If you’ve got any suggestions or thoughts to share, I’ll be in the comment section below.